TABLE OF CONTENTS
- ATTENDANCE OPTIONS
- MANAGE REASONS
- ADD A REASON TYPE
- MANAGE DAYS
- MARKING ATTENDANCE
- LATE ARRIVALS AND EARLY DEPARTURES
- ROLL LOGS
- FUTURE ATTENDANCE
- UNEXPLAINED ABSENCES
- SETTING UP UNEXPLAINED ABSENCES and SMS SCHEDULE
ATTENDANCE OPTIONS
Admins have the same options in the nForma portal roll as in the old nForma roll. There are 5 different
areas to the nForma portal roll for admins:
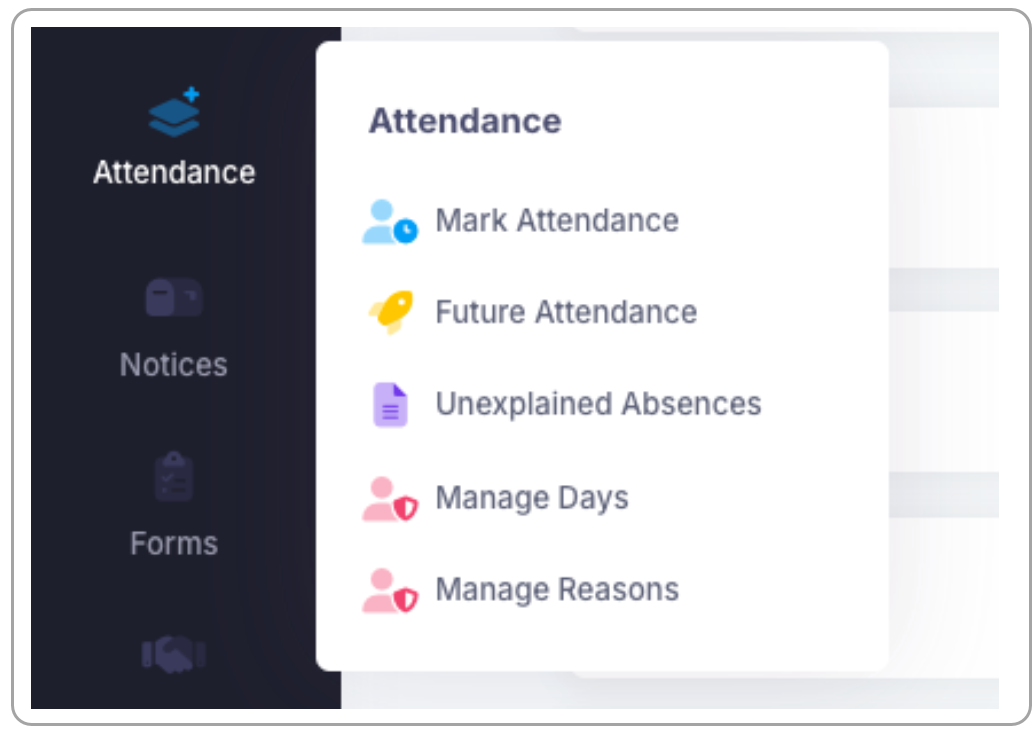
Mark Attendance
Where both admin and teachers can mark the attendance roll
Future Attendance
Where both admin and teachers can mark a student’s future attendance and recurring absences
Unexplained Absences
A page to view roll statuses and students who are marked as absent unexplained
Manage Days
Where admins can mark “non-school days”
Manage Reasons
Where admins can add/edit reason types for the teacher roll and the options for the parent app
MANAGE REASONS
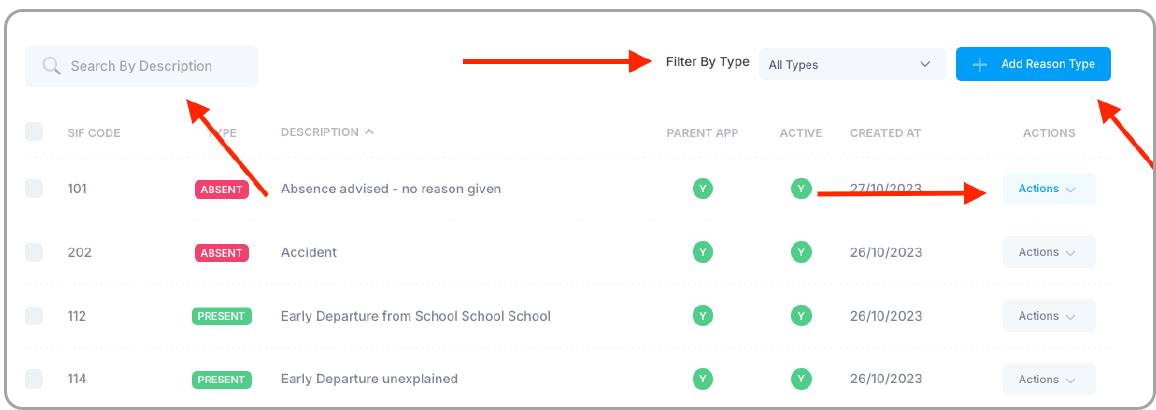
Manage reasons is where admins can add/edit and remove reason types for the teacher’s roll and also from the parent’s app. You will be able to filter by the attendance type, search for the reason type, add new reasons and edit old ones.
ADD A REASON TYPE
Type
Select the option of Absent, Present, Unmarked or Other
SIF Reason Code
Select the SIF code that best relates to what you are adding
Custom Name
This is the name of the reason type that will be displayed
Display on Parent App
Tick this box if you want the reason type to be an option for parents to use
Active
If you want to remove a reason type, you can deactivate. It cannot be deleted if it has been used before
MANAGE DAYS
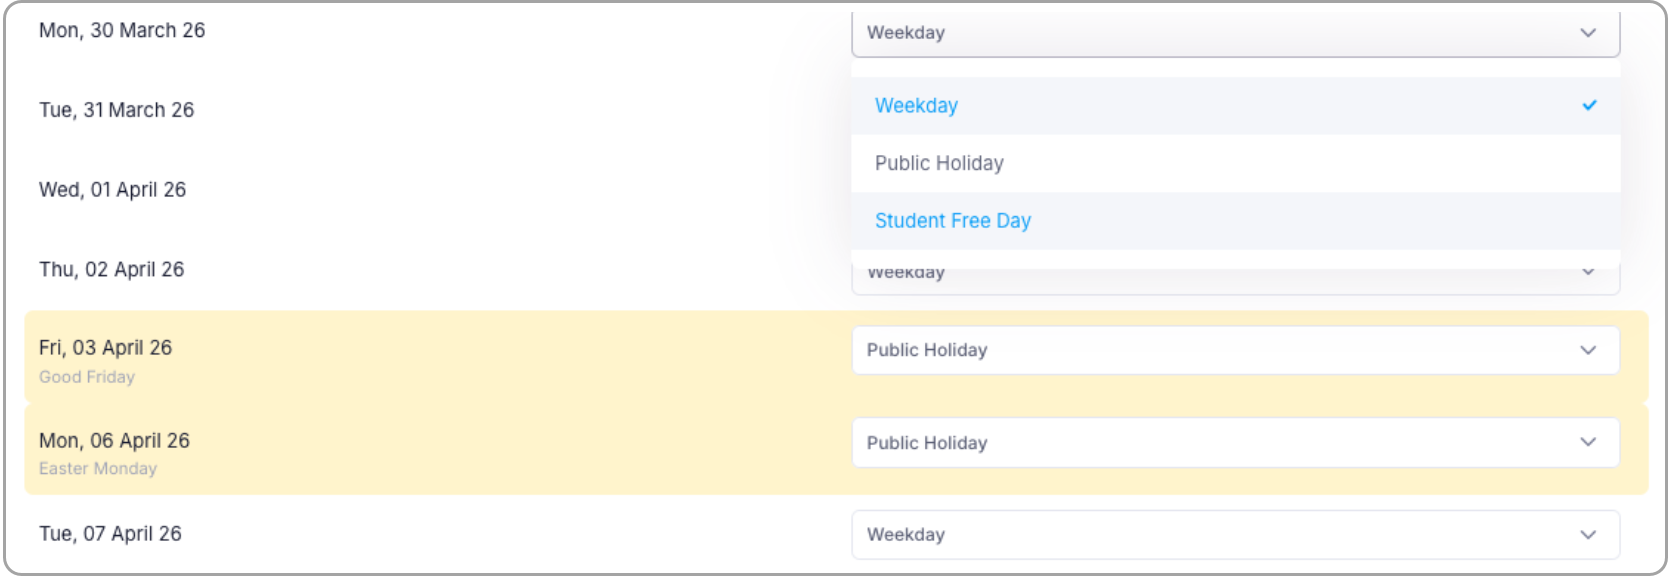
Manage Days is where admins can go in and mark “non-school days”. To mark a non-school day, click on the “Manage Days” option. Go to the term and find the day. Click on the dropdown and select “Student Free Day”. If you receive an error, it means there is a student absence recorded. You will need to go to the roll for that day and mark the roll as “unmarked”. This will remove all attendance records marked on the roll. Once done, repeat the process, you will then see the day marked as a student free day.
You will notice that Public Holidays are already in the system, they will not need to be entered.
MARKING ATTENDANCE
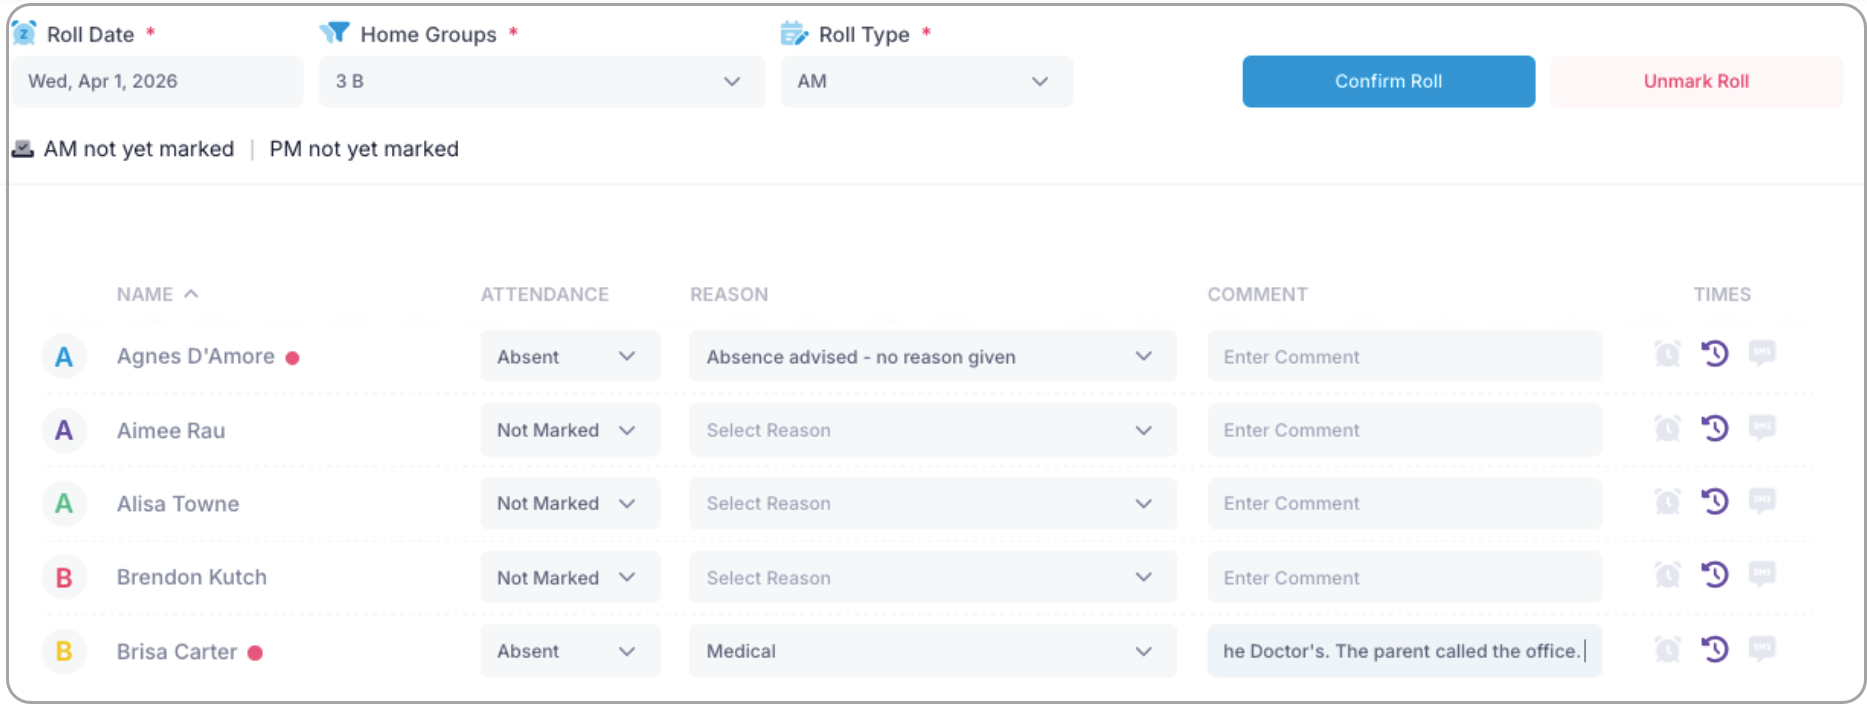
The attendance roll is available to all users to mark. Staff will be able to select the date, home group and roll type. The quickest way for a teacher to mark the roll would be to mark all the student absences first.
Once done, confirm the roll via the blue "Confirm Roll" button.
They will then be prompted with a message asking if they would like to mark all remaining students as “Present”.
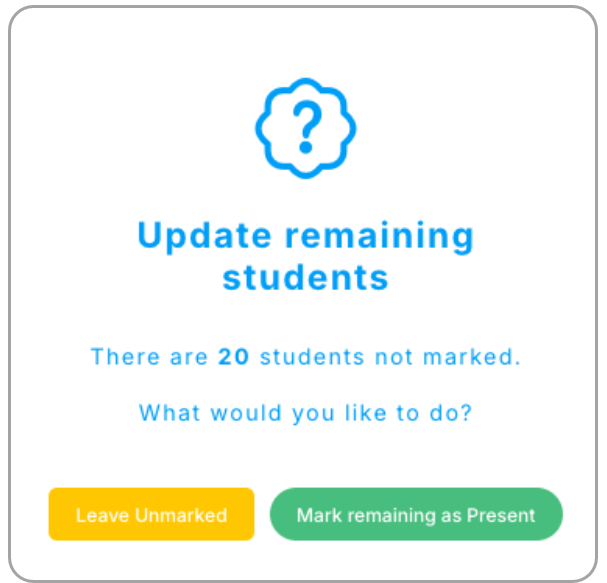
Accept the message and then the roll will be marked.
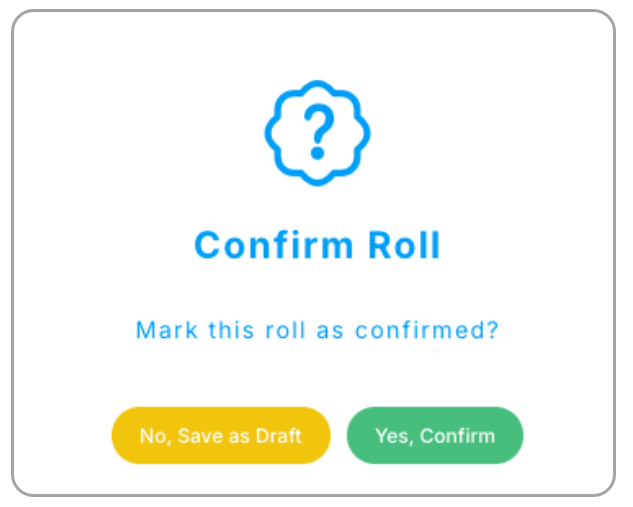
Roll Updated.
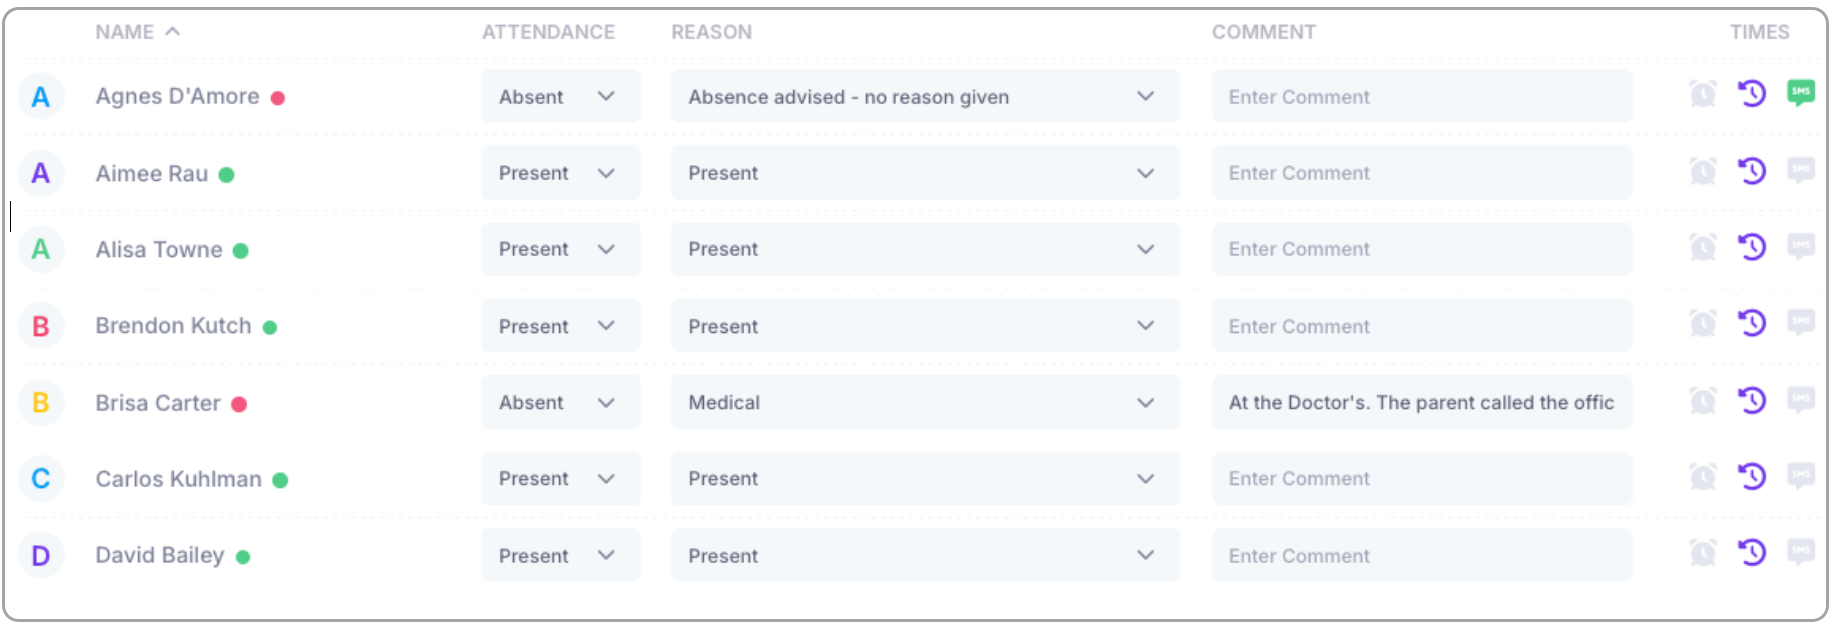
Note: There is no “Communication type” in the new roll. All communication notes can be added to the “Comment” section of the roll.
LATE ARRIVALS AND EARLY DEPARTURES
Late arrivals and early departures are marked differently in the attendance roll. To mark a student as
late arrival or early departure, select the “Present” attendance type and the related reason type. Once
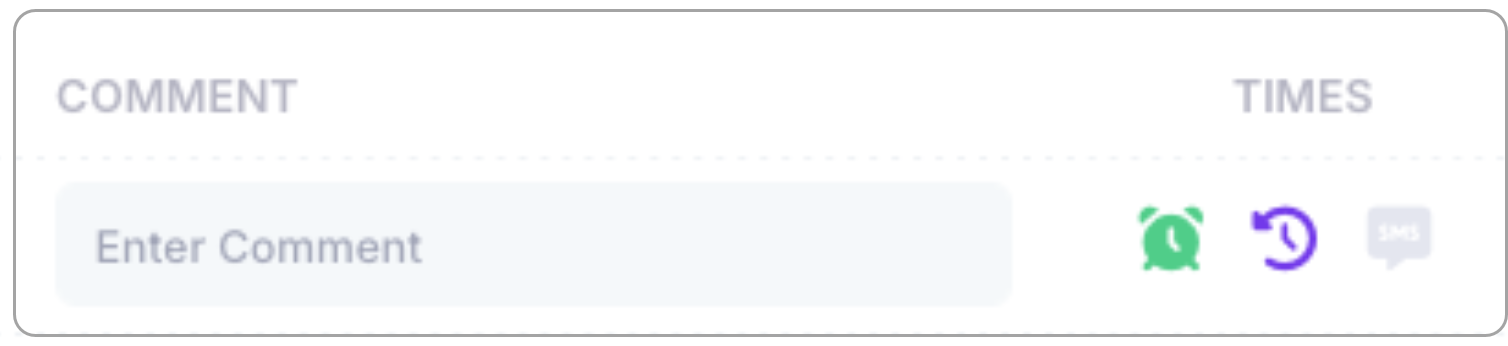
done, you will then need to click on the clock icon.

Under the first option, input the time and then the reason again and save.
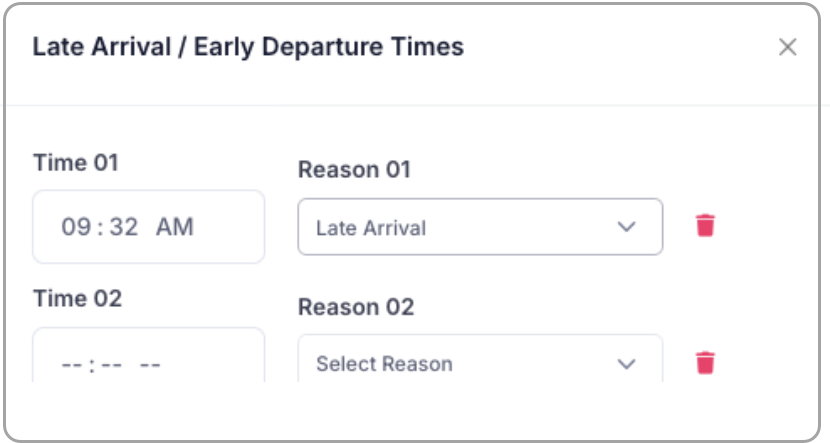
You will then see the icon turn green. This option will allow you to also sign a student out if they leave early and can also sign them back in.
ROLL LOGS
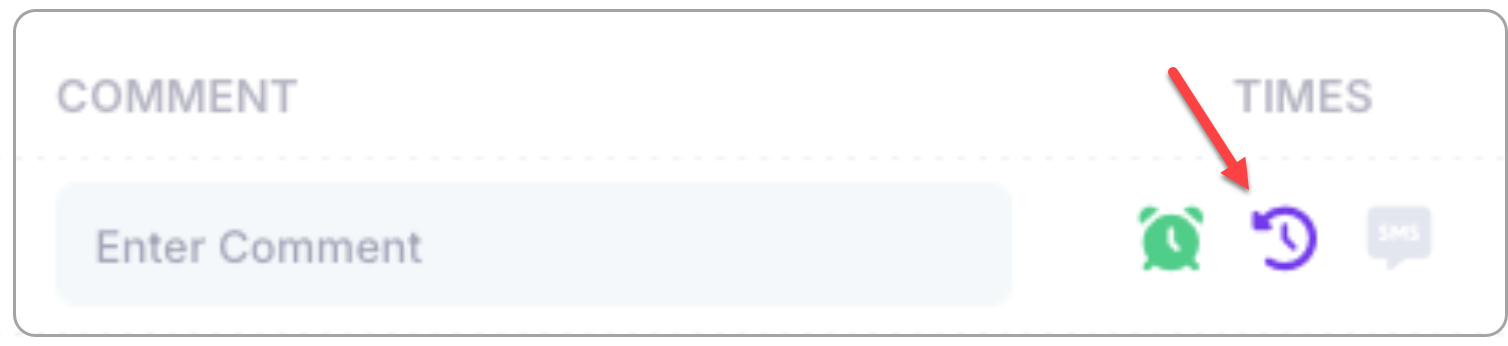
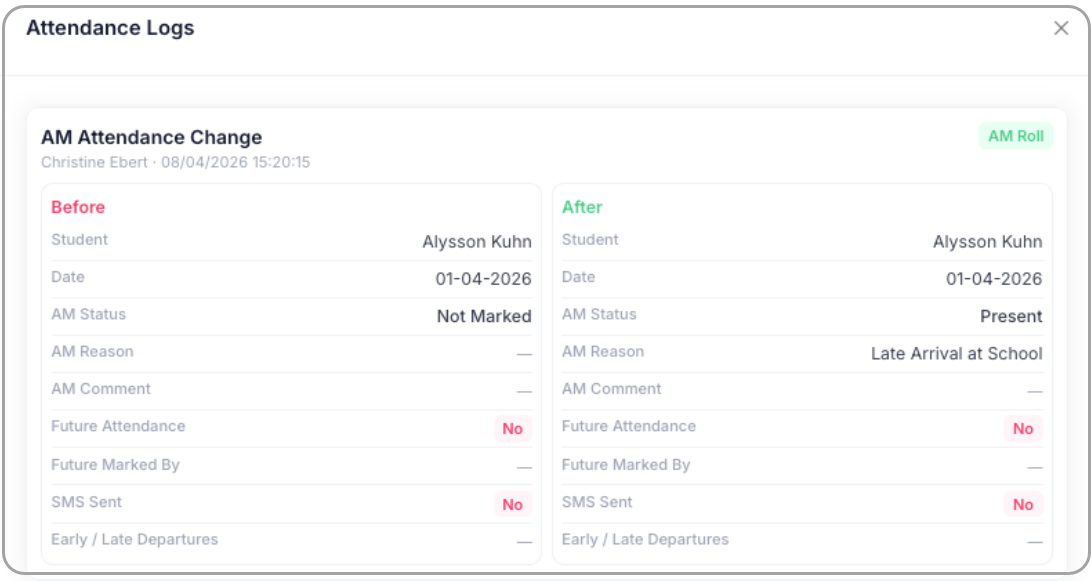
Once a roll has been marked, you will have access to the roll logs. This will show all changes that have
been made to a student’s attendance record. To access the logs, click the middle purple icon next to the
alarm clock.
FUTURE ATTENDANCE
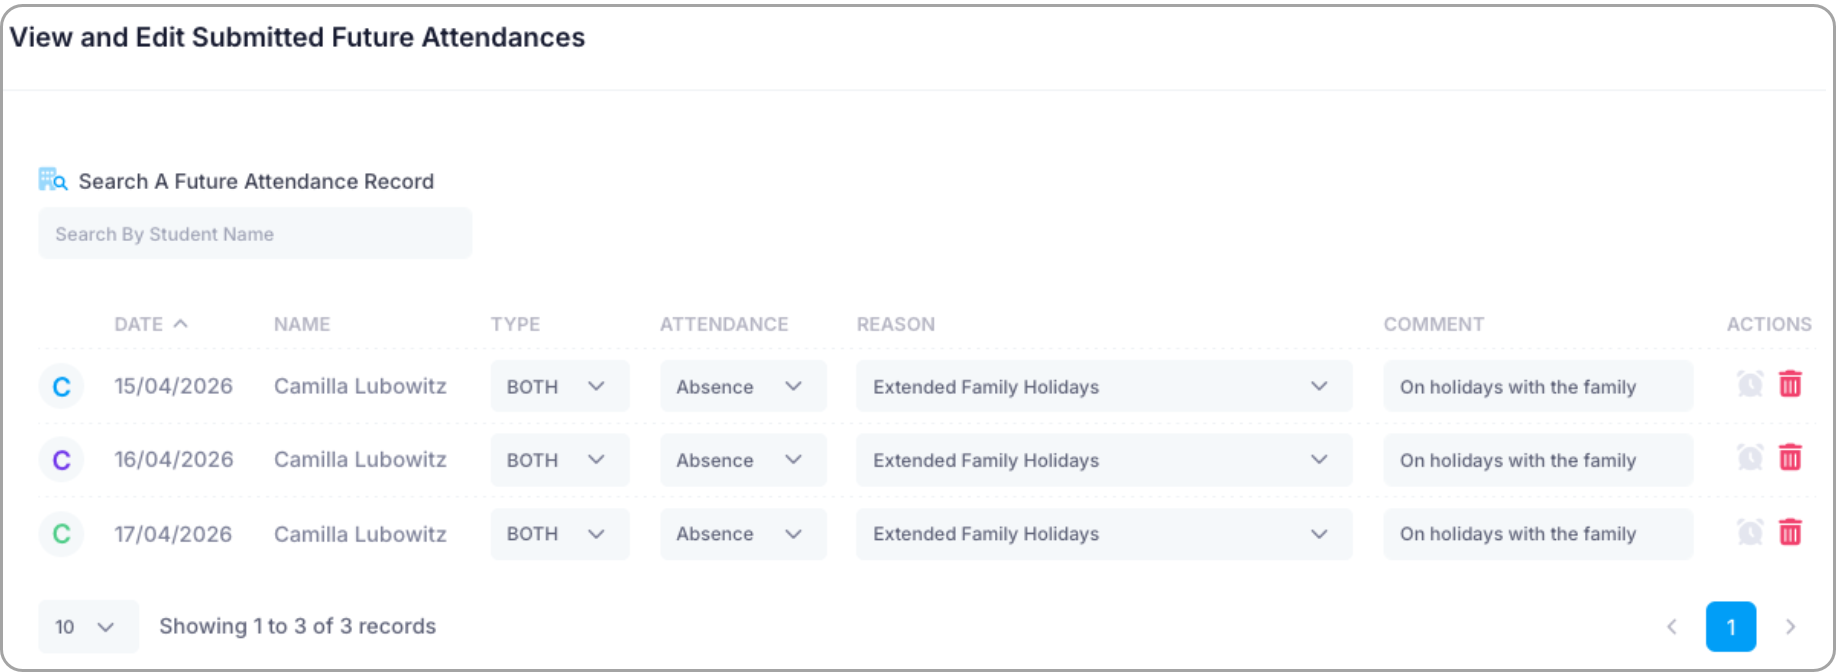
Marking a student’s future attendance can be done by clicking the “Future Attendance” option. Fill in all
the options and then “submit”. The record will then be displayed in the window below. All future and
recurring absences for the year will be displayed in that window.

If any records need to be edited, you can simply update the records via the drop downs.
UNEXPLAINED ABSENCES
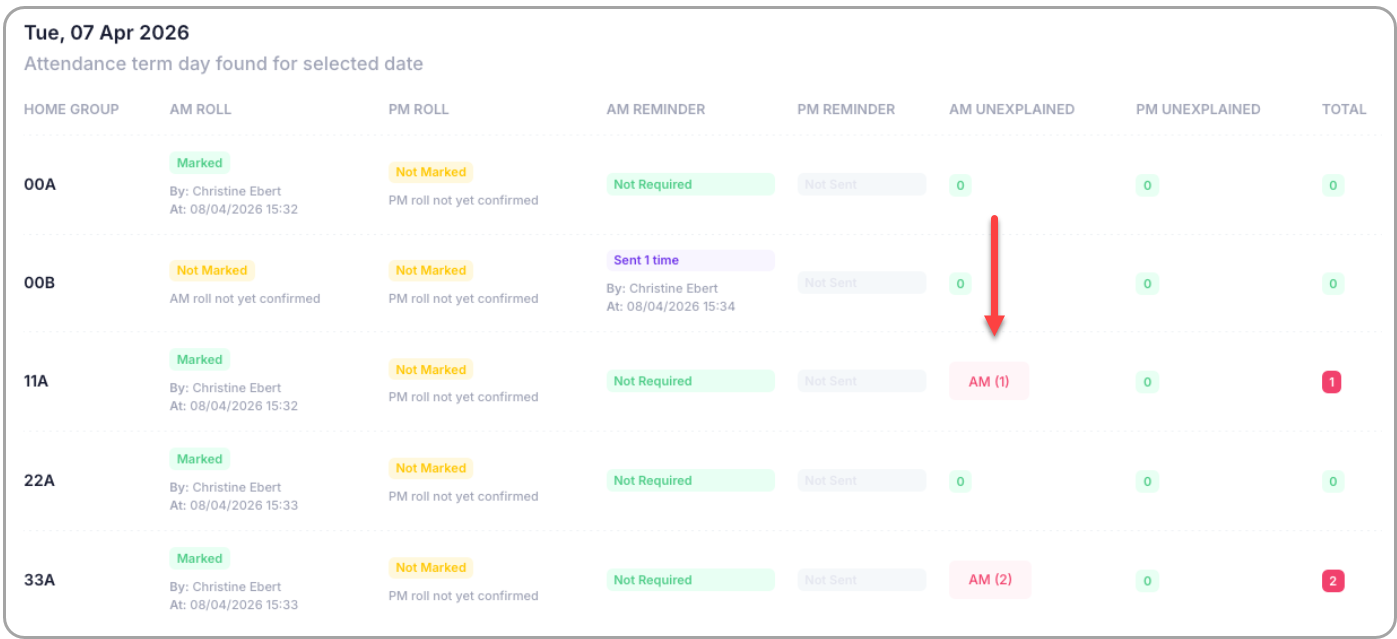
The unexplained absences page will allow admins to view which rolls have not been marked and which
students have been marked as absent and unexplained. It will also allow admins to send reminder
emails to teachers who have not marked their respective rolls.
To view the students marked as unexplained absent, click on the red AM buttons. The students will then
appear there.
SETTING UP UNEXPLAINED ABSENCES and SMS SCHEDULE
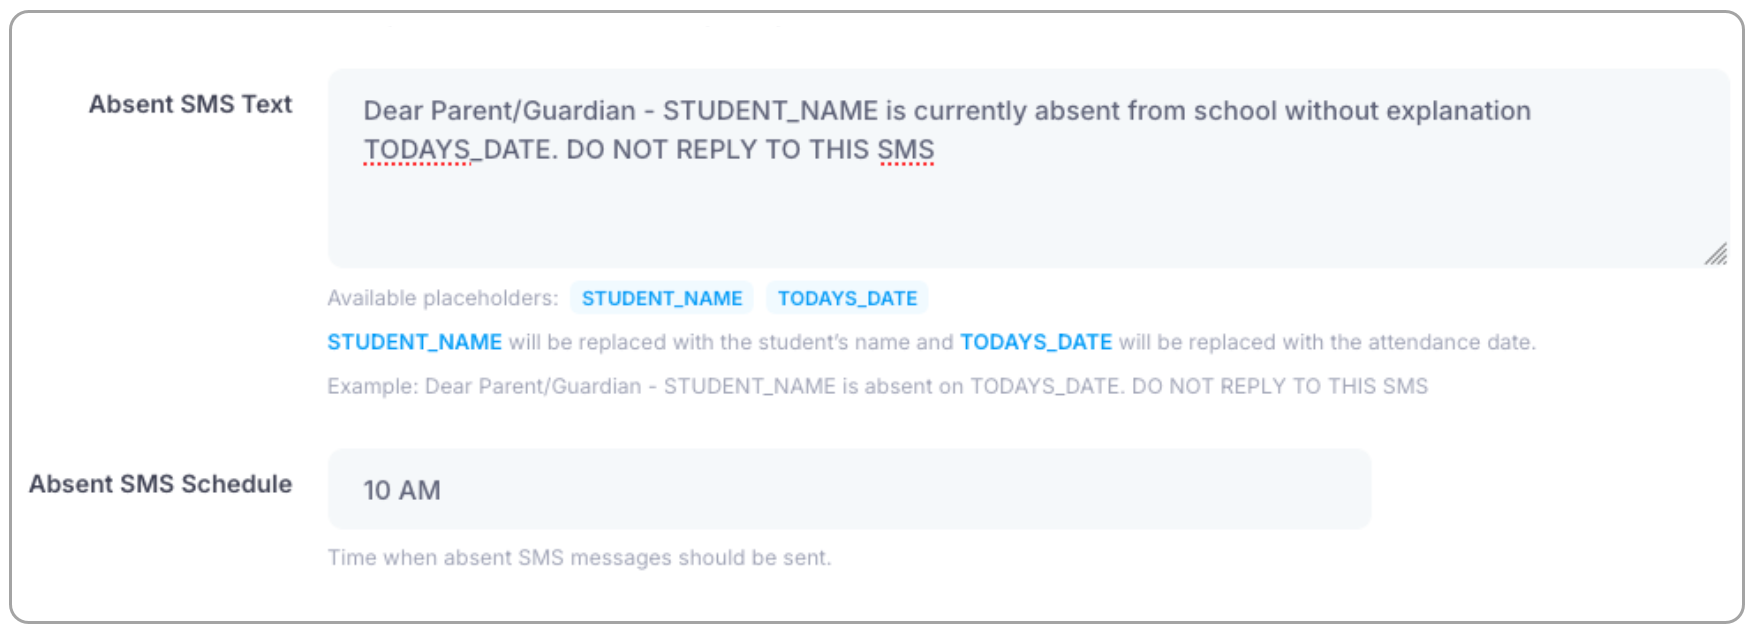
There are two setup options that school admins can edit. Schools will be able to setup their SMS message that is sent to parents. The unexplained SMS messages will also be automatically sent based off of the time the school allocates. To set these up, go into “Apps” > “School” > “School Details”. There click on “Edit School” and scroll to the bottom. There, you can set what the SMS message will be and at what time.
Was this article helpful?
That’s Great!
Thank you for your feedback
Sorry! We couldn't be helpful
Thank you for your feedback
Feedback sent
We appreciate your effort and will try to fix the article